
Today we will learn how to create our own recursive DNS server using Unbound. This will improve performance through caching. We will also look at blocking unwanted pages.
Download the Official Unbound DNS files from the Github Repository which is given here “NLnetLabs-unbound”
WARNING: I am by no means an expert in Unbound DNS! I tried to explain about Unbound DNS set up the best way I could, and I’m sure I might have made a few mistakes here and there. So if a mistake was made or something is misleading, then please let me know in the comments section!
Step 1: Install Unbound
The Unbound package is included in the base repositories for most Linux distributions, installing separate repositories is usually not necessary.
ON UBUNTU
# apt-get update && apt-get install -y unbound
ON CENTOS
# yum install -y unbound
Step 2: ON UBUNTU
Change /etc/unbound/unbound.conf:
include: /etc/unbound/unbound.conf.d/*.conf
ON CENT OS
Change /etc/unbound/unbound.conf:
include: /etc/unbound/conf.d/*.conf
Next, we will enable unbound

After the package has been installed, make a copy of the unbound configuration file before making any changes to the original file.
# cp /etc/unbound/unbound.conf /etc/unbound/unbound.conf.original
Next, use any of your favourite text editor to open and edit ‘unbound.conf‘ configuration file.
# vi /etc/unbound/unbound.conf
Enable IPv4 and Protocol Supports
Search for the following string and make it ‘Yes‘.
do-ip4: yes
do-udp yes
do-tcp: yes
Enable the logging
To enable the log, add the variable as below, it will log every unbound activities.
logfile: /var/log/unbound
Hide Identity and Version
Enable the following parameters to hide id.server and hostname.bind queries.
hide-identity: yes
Enable the following parameter to hide version. server and version.bind queries.
hide-version: yes
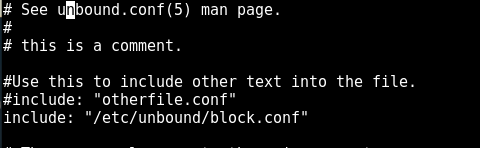
Include the block file path to the unbound.conf file to set up the block list for unbound.
NOTE: Change the resolv.conf IP to the interface IP if you are running Unbound Locally in your system
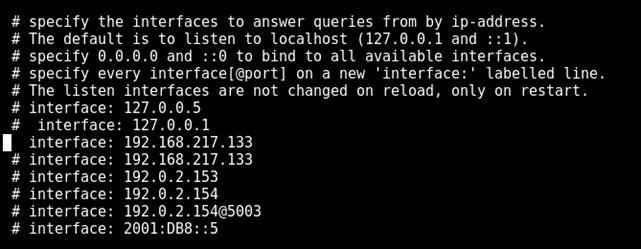
Add the system or server IP to the interfaces list
By default, the port is 53 if change is required just edit the port number
NOTE: check whether any other process is using that port using the command netstat -tunlp

Next, Change the access control for our interface IP network

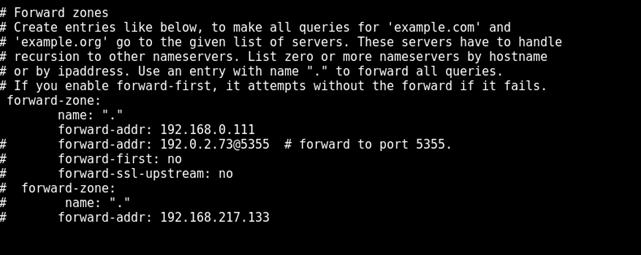
Forward zones is where the IP is forwarded after requesting our local server. After the request has been made to our server the recursive call is made to the ISP’s DNS server.
After making the above configuration, now let’s verify the unbound.conf file for any errors using the following command
# unbound-checkconf /etc/unbound/unbound.conf

After verifying the file without any errors, you can safely restart the ‘unbound’ service and enable it at system startup.
# systemctl start unbound.service
# sudo systemctl enable unbound.service

Blocklist File
NOTE: Inside the block.conf always start with server: on top of the file
The Blocklist can be created as a static list or you could fetch the website list from various repositories which cater sites list. One such list which I found useful was “StevenBlack” Github Repo where he has a well-curated block list from various sources.
All the Blocklist entries are having the same format, so we can use our custom scripts to fetch the list and change it to our need. For updating our list daily we could run our script as a cronjob

DNS CACHE SETUP
Test DNS Cache Locally
Now it’s time to check our DNS cache, by doing a ‘drill’ (query) on ‘india.com‘ domain. At first, the ‘drill‘ command results for ‘india.com‘ domain will take some milliseconds, and then do a second drill and have a note on Query time it takes for both drills.
drill india.com @192.168.0.50
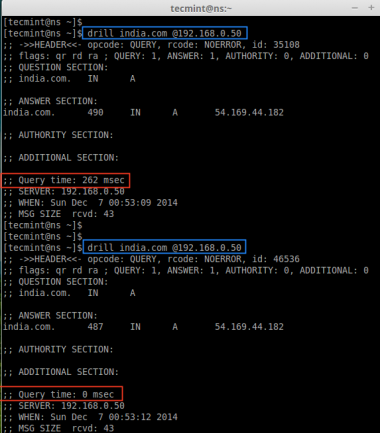
As you can see in the above output, the first query taken almost 262 ms to resolve and the second query takes 0 ms to resolve domain (india.com). That means, the first query gets cached in our DNS Cache, so when we run ‘drill’ second time the query is served from our local DNS cache, this way we can improve loading speed of websites.
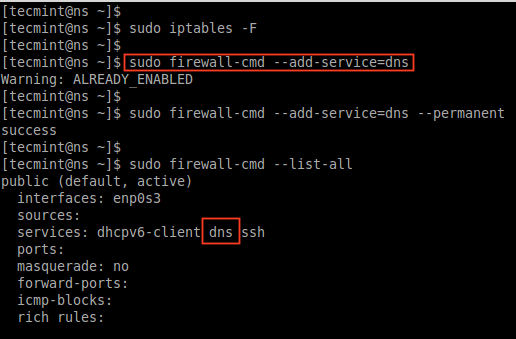
Flush Iptables and Add Firewalld Rules
We can’t use both iptables and firewalld at same time on the same machine if we do both will conflict with each other, thus removing ipables rules will be a good idea. To remove or flush the iptables, use the following command.
# iptables -F
After removing iptables rules permanently, now add the DNS service to firewalld list permanently.
# firewall-cmd --add-service=dns
# firewall-cmd --add-service=dns --permanent
After adding DNS service rules, list the rules and confirm.
# firewall-cmd --list-all
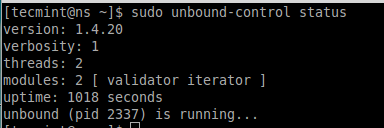
Managing and Troubleshooting Unbound
To get the current server status, use the following command.
# unbound-control status
Flushing DNS Records
To check whether the specific address was resolved by our forwarders in unbound cache Server, use the command given below.
# unbound-control lookup google.com

Sometimes our DNS cache server will not reply to our query, in the meantime, we can use flush command to remove information such as A, AAA, NS, SO, CNAME, MX, PTR etc.. records from DNS cache. We can remove all information using flush_zone this will remove all informations.
# unbound-control flush www.google.com
# unbound-control flush_zone bing.com
To check which forwards are currently used to resolve.
# unbound-control list_forwards

now it’s time to restart the network using following command.
# /etc/init.d/network restart
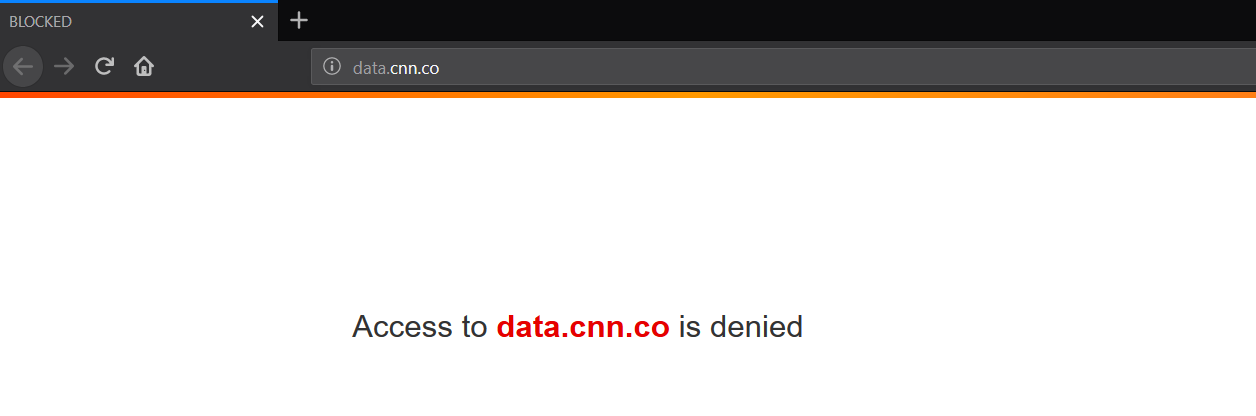
Setting Up Apache Server to serve the Block Page
let’s make a directory for keeping our block page files and for the log files
# mkdir -p /var/log/httpd/blocking.com
Lets Uncomment 404 page and add /index.php or the path from /etc/httpd/conf/httpd.conf for serving our custom page
Now let’s make the necessary changes in our block page and start our apache server
# systemctl restart httpd.service
Finally, if we start our unbound DNS Server and browse to any website which is included in the block list we will be greeted with this Block Page

Leave a Comment